Automatic transmission oil cooler line/hose replacement
DIY and how-to
articles on repairing the Saab 9-5 SE.
Updated:
Disclaimer: We own a 2000 Saab 9-5 SE 6 cylinder 4-door sedan. This information may not be at all applicable to other Saab 9-5 models.
Immediately before our Christmas vacation trip to Denver and Scotts Bluff, Nebraska in 2008, I noticed automatic transmission fluid had been leaking. Not a huge amount, but enough that I didn't want to have to worry about it during our trip. A little bit of investigation revealed that the washers on the banjo bolt that secure the oil cooler line to the top fitting on the radiator had gone bad. I scrounged around in my stash and found some suitable temporary sealing washers. No more leaks from that location on the 2000+ mile round trip.
But then in mid-January, 2009 I began seeing fresh spots of transmission fluid on the garage floor. I looked carefully at all the washers on all 4 banjo bolts that secure both oil cooler lines...no detectable leaks there. Must be the automatic transmission oil cooler lines themselves, as they were pretty soaked with fluid with no other visible source.
I ordered replacement hoses from my favorite Saab parts supplier: eEuroParts. But, they didn't show the special washers for the banjo bolts on their web site. Rather than spend USD $4.00 each at the local Saab dealer, I ordered suitable replacements, McMaster-Carr part number 93786A225. I ordered 2 packs of 5 (USD $5.66 per pack). The washers are a perfect fit, work perfectly, and are a lot less expensive.
Installation
The parts from eEuroParts arrived and were precisely what I needed. Same for the sealing washers from McMaster-Carr. The sealing washers were a snug fit on the inside diameter, just like the originals when I removed them. The outside diameter of the sealing washers is larger than original, but there is plenty of room for the extra size when fitted.
Fitting the new lines was pretty straightforward. Here's a quick rundown:
- Open the hood. (that was easy!)
- Start by draining the automatic transmission fluid. I do this every 3,000 miles when I change engine oil anyway. The Dextron 3 fluid required by the transmission is inexpensive and a drain and fill only requires about 3.4 quarts (have you priced a replacement transmission lately?).
- While the transmission fluid was draining, I jacked up the left front of the car and then removed the large black plastic piece that is attached to the bottom of the front bumper and to the frame further back. Removal is needed to gain access to the lines for routing, etc.
- Loosen the large hose clamp that secures the air intake duct near the bottom left corner of the radiator. It may look a bit like a radiator hose, but it isn't. Just give it a good squeeze and you'll confirm there isn't any fluid inside. With the hose clamp loosened, move the duct up and out of the way. It is pretty flexible. I pretty much folded it back on itself in front of the battery. Much more room to work now.
- Remove each of the 4 banjo bolts.
- Remove the lines, pulling them out from the top.
- Thoroughly clean the banjo bolts, paying special attention to the threads; then fit a new sealing washer next to the head of each bolt.
- Wiggle each new hose into place on the car
- Add the second sealing washer to each banjo bolt and loosely secure the lines.
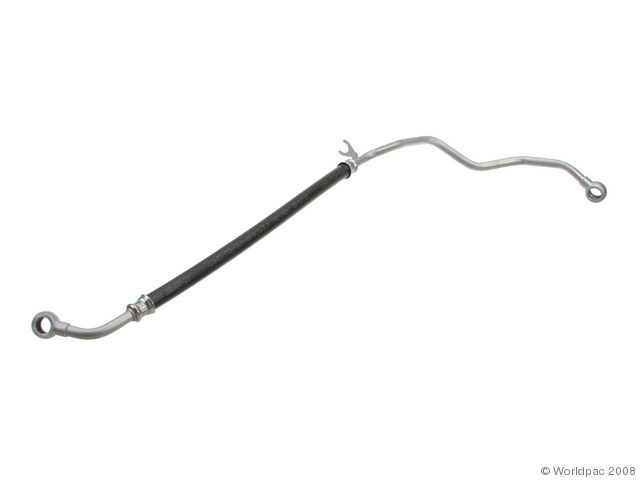
- One of the interesting things about the upper hose is that it has a little metal tab that sticks out (see the photo below). I believe the purpose of this tab is to properly align the upper hose with the bottom hose during assembly. When I removed my original hoses, the tab was not in this position. I decided to remove the tab so that I would avoid any metal-to-metal vibration/contact between the two lines. I don't know if that was the best plan of attack, but that is what I chose to do. Probably the lines would have worked just fine with the metal doing it's intended purpose.
- With the hoses carefully routed, tighten each banjo bolt securely.
- Replace the drained fluid from the transmission, fit the air intake duct in place, and then start the engine and check for leaks. (No leaks for me!)
- Secure the large black plastic piece in place, lower the jack, and you are ready to roll.
- Start to finish, it took me less than 2 hours at a very leisurely pace.
The car has been used extensively over the past month with no detectable leaks. The new hoses and sealing washers are doing their job nicely.

Photo courtesy of eEuroParts.

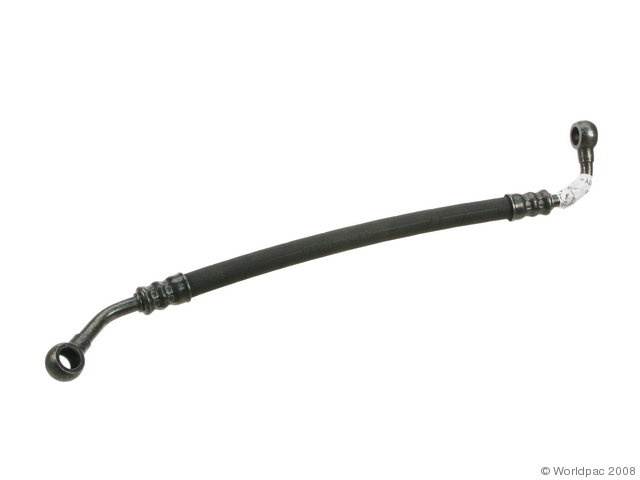
Photo courtesy of eEuroParts.